Appearance
Authorization Code
Instructions on how to integrate authorization code flow 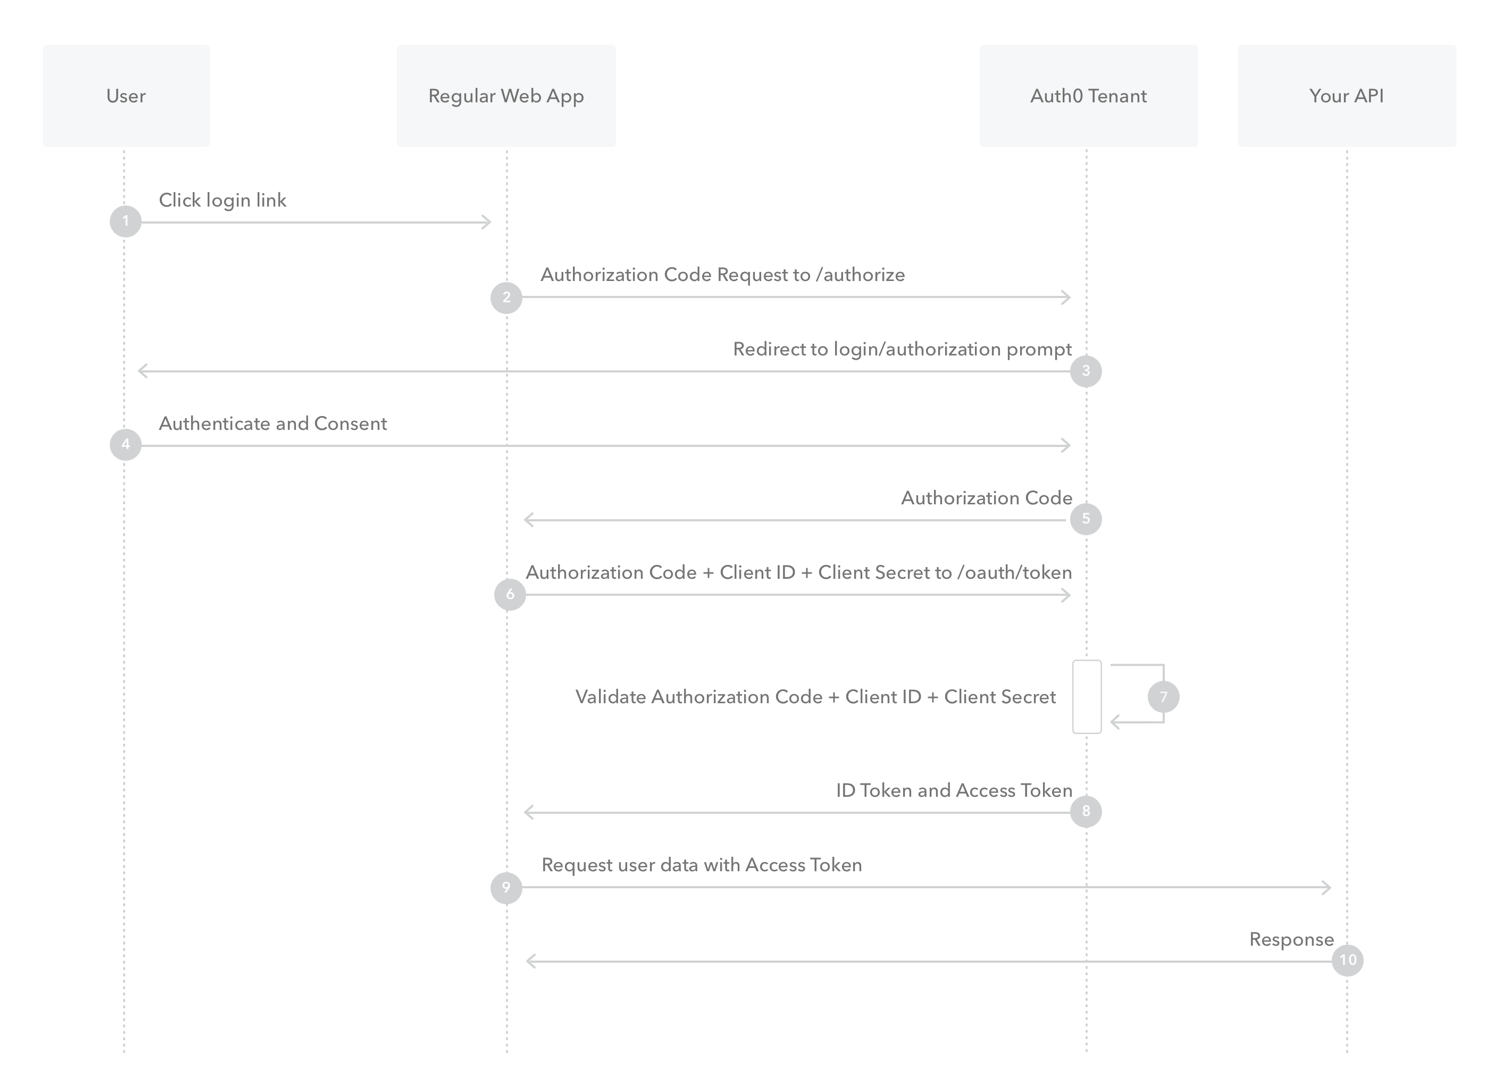
- The user clicks Login within the regular web application.
- Auth0's SDK redirects the user to the Auth0 Authorization Server (/login endpoint).
- Your Auth0 Authorization Server redirects the user to the login and authorization prompt.
- The user authenticates using one of the configured login options and may see a consent page listing the permissions Auth0 will give to the regular web application
- Your Auth0 Authorization Server redirects the user back to the application with an authorization code, which is good for one use.
- Auth0's SDK sends this code to the Auth0 Authorization Server (/auth/token endpoint) along with the application's Client ID and Client Secret.
- Your Auth0 Authorization Server verifies the code, Client ID, and Client Secret.
- Your Auth0 Authorization Server responds with an ID Token and Access Token (and optionally, a Refresh Token).
- Your application can use the Access Token to call an API to access information about the user.
The API responds with the requested data.
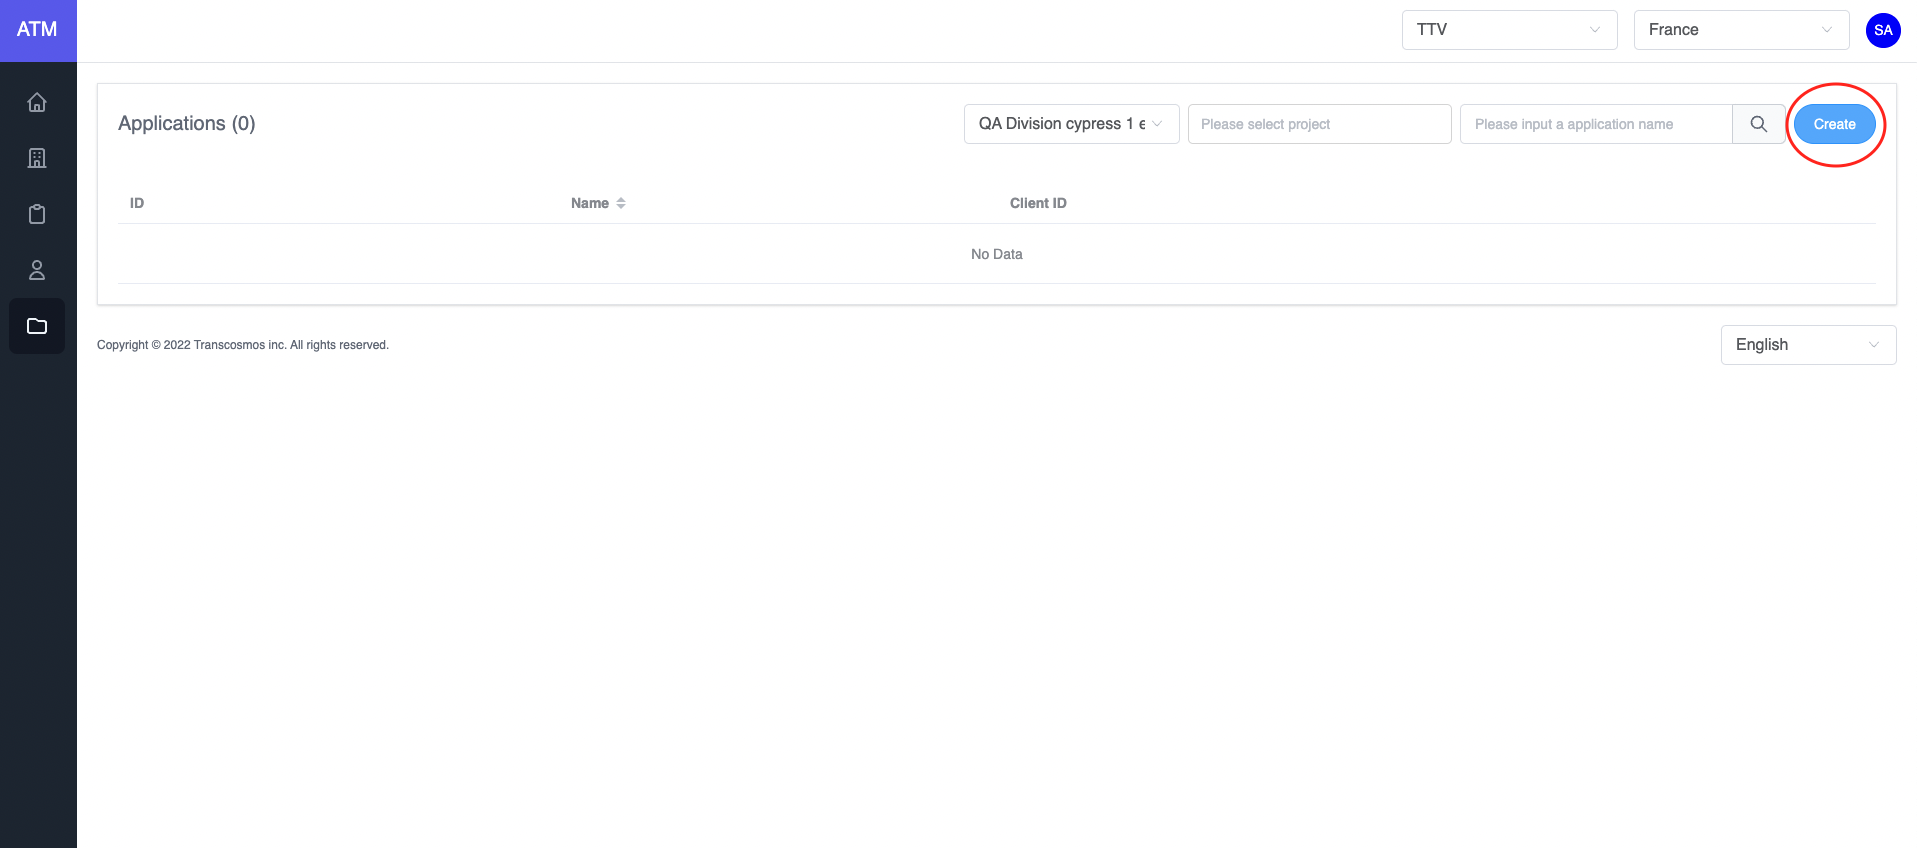
- Create application
- Access the Application page
- Click on the Create button
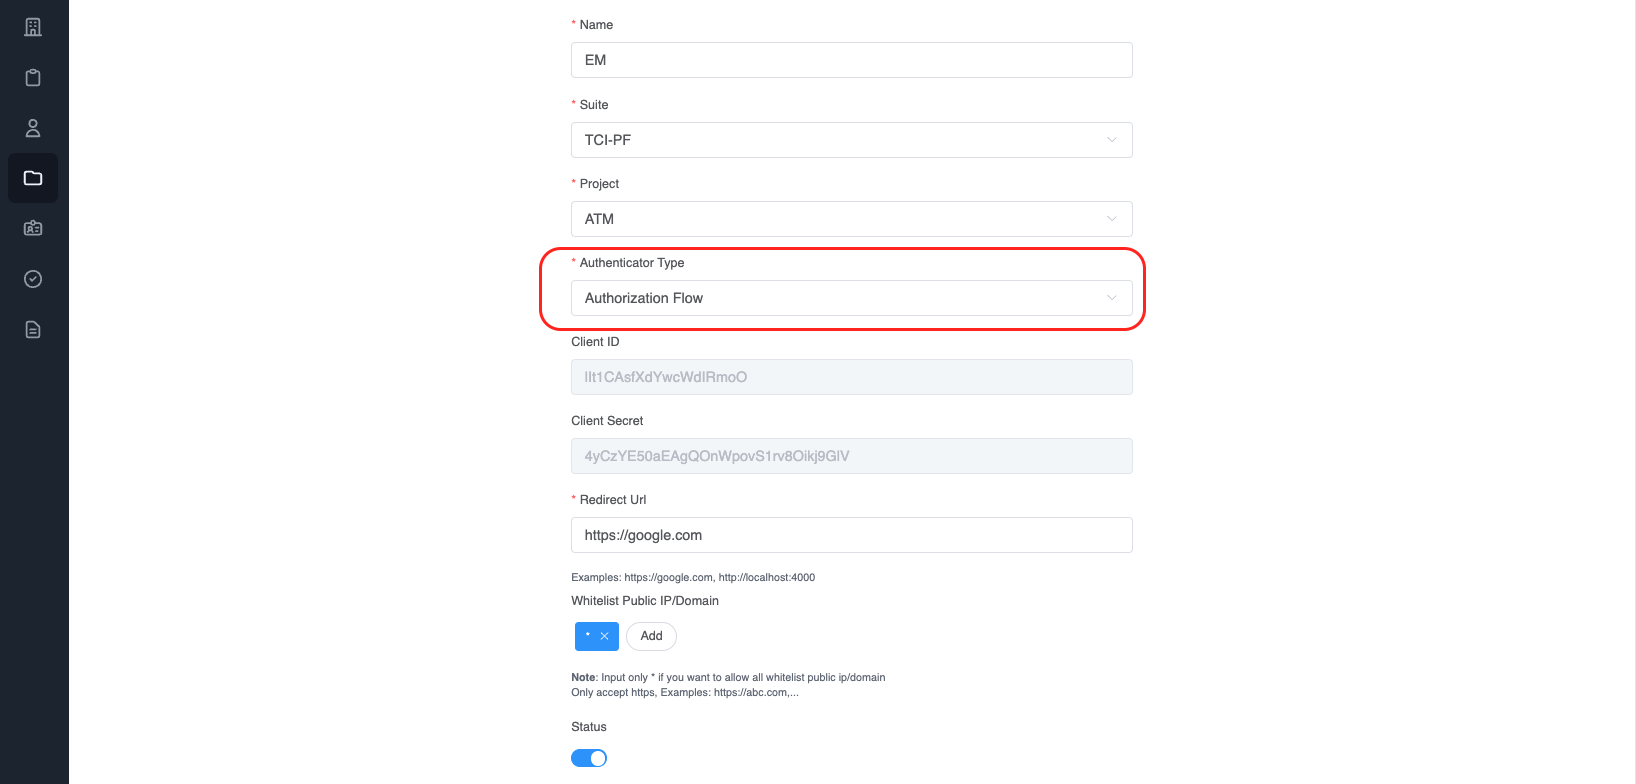
- Choose
Authenticator TypeisAuthorization Flow - Enter Redirect Url which is the callback URL after user login success
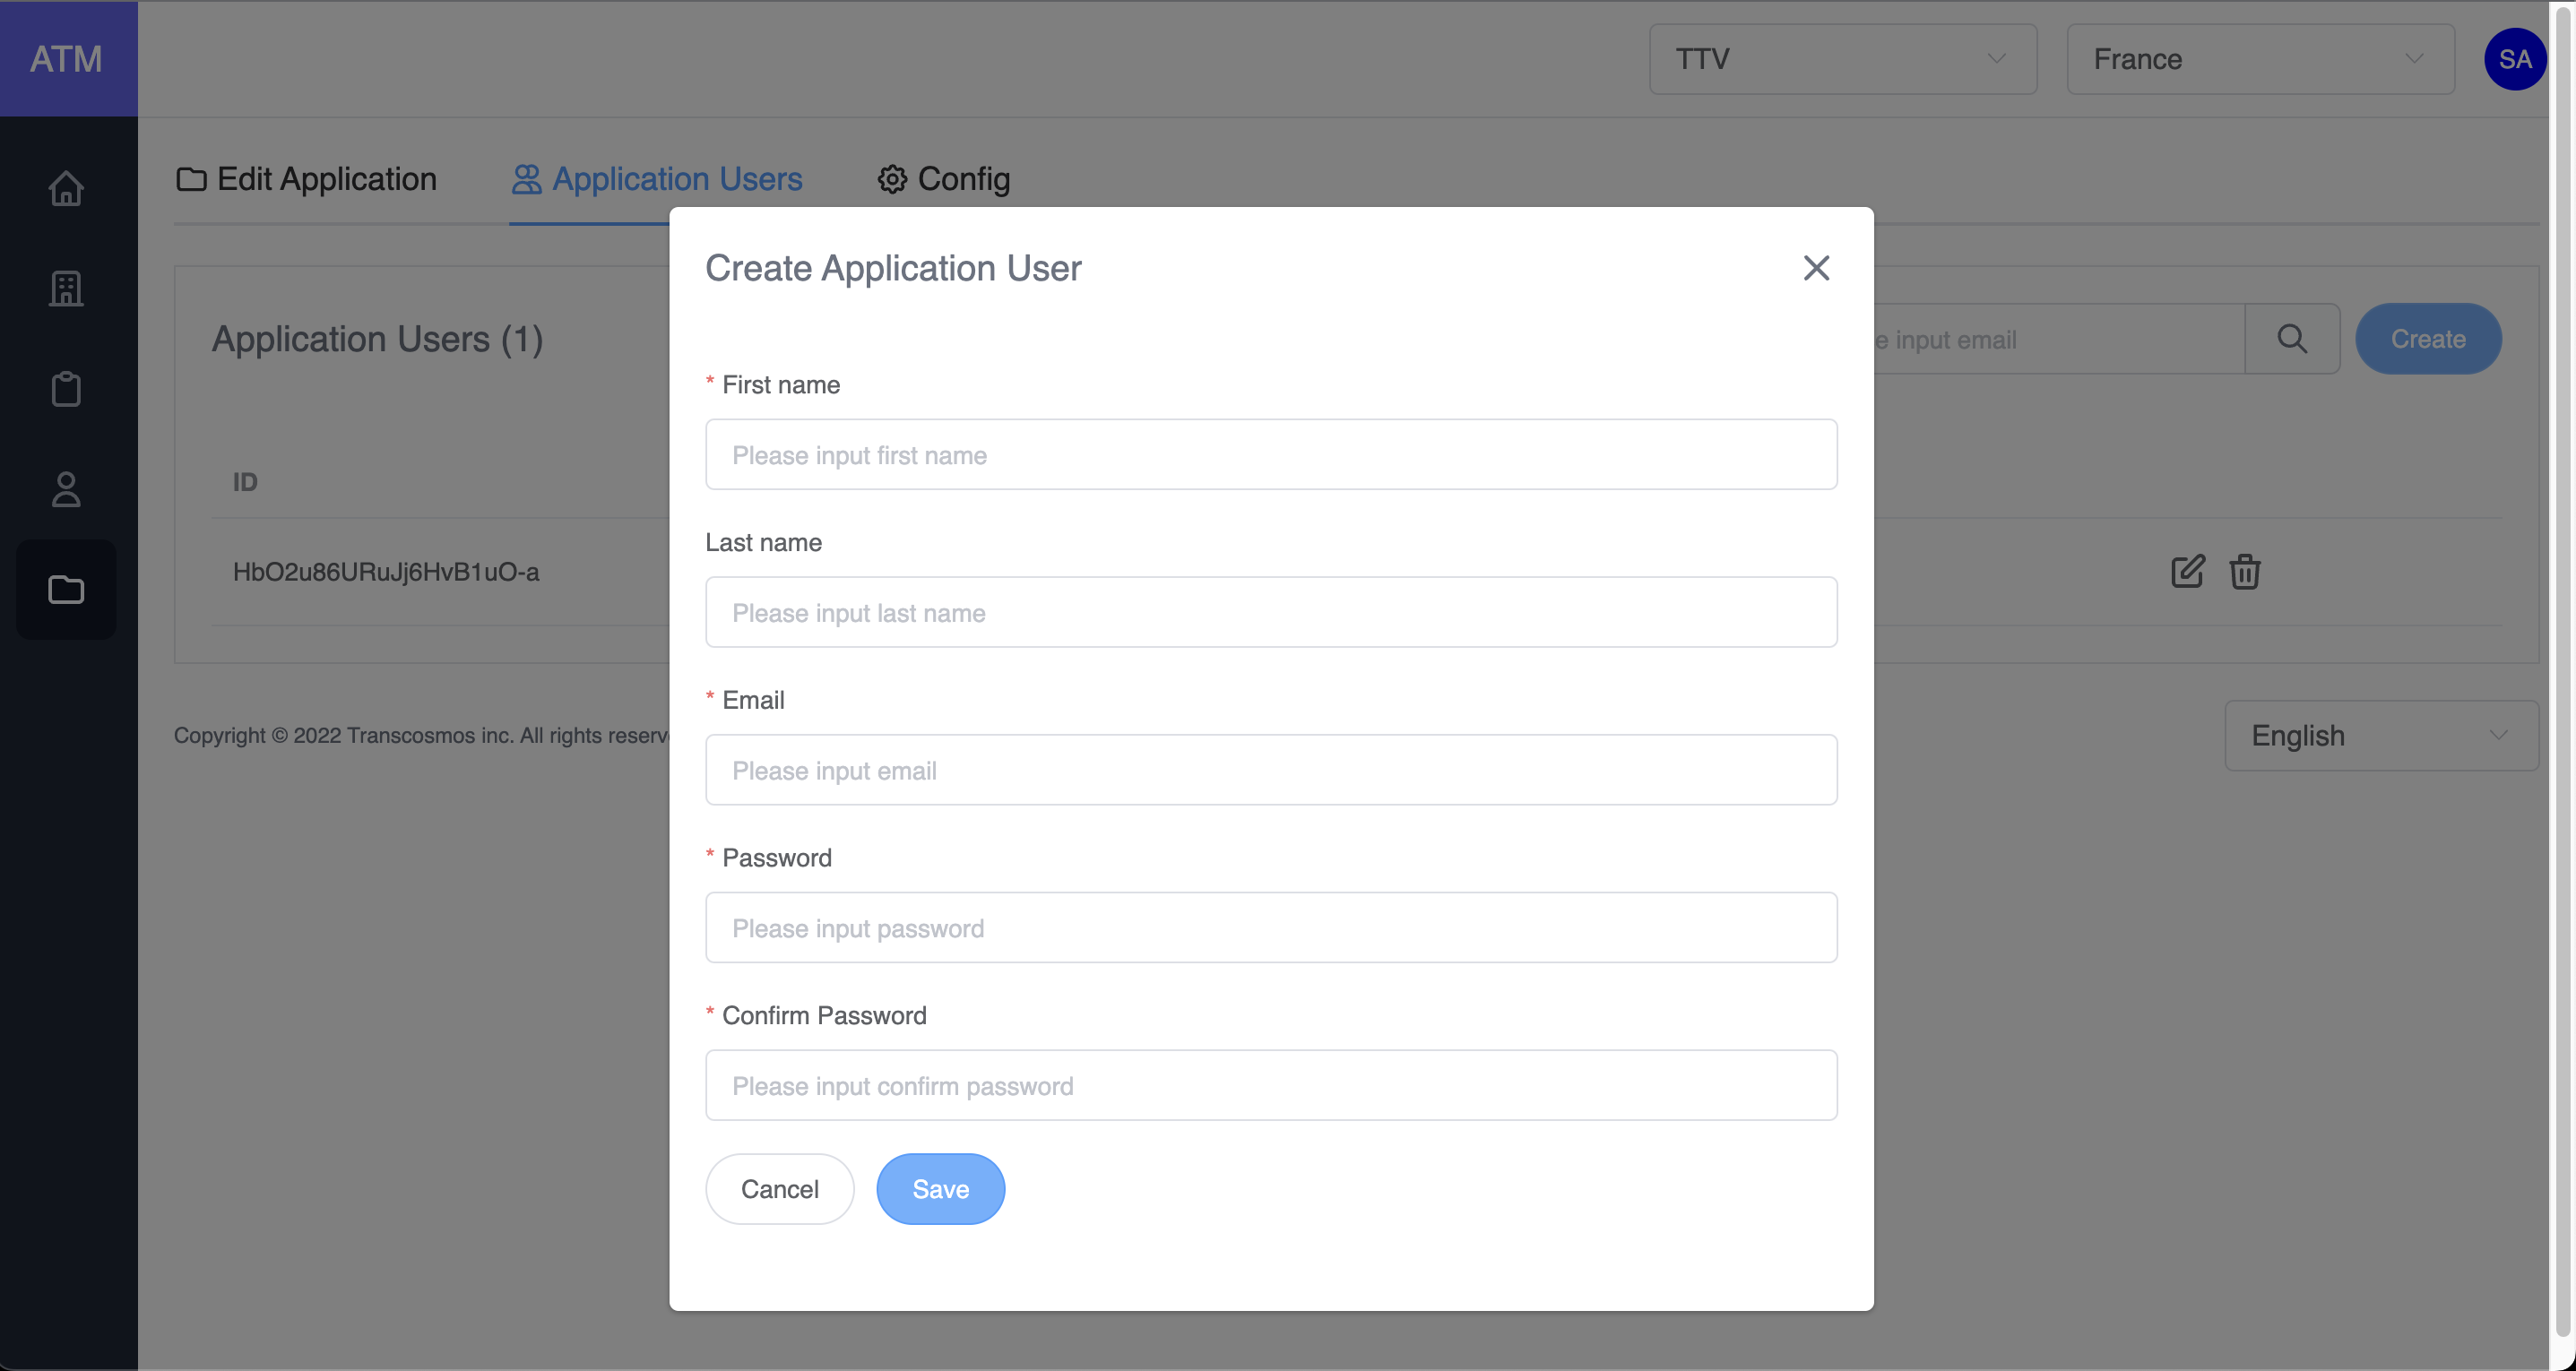
- Add user to application
- On the applications grid, click the edit icon of record where you want to edit the application
- Click on tab Application Users
- Click on the Create button
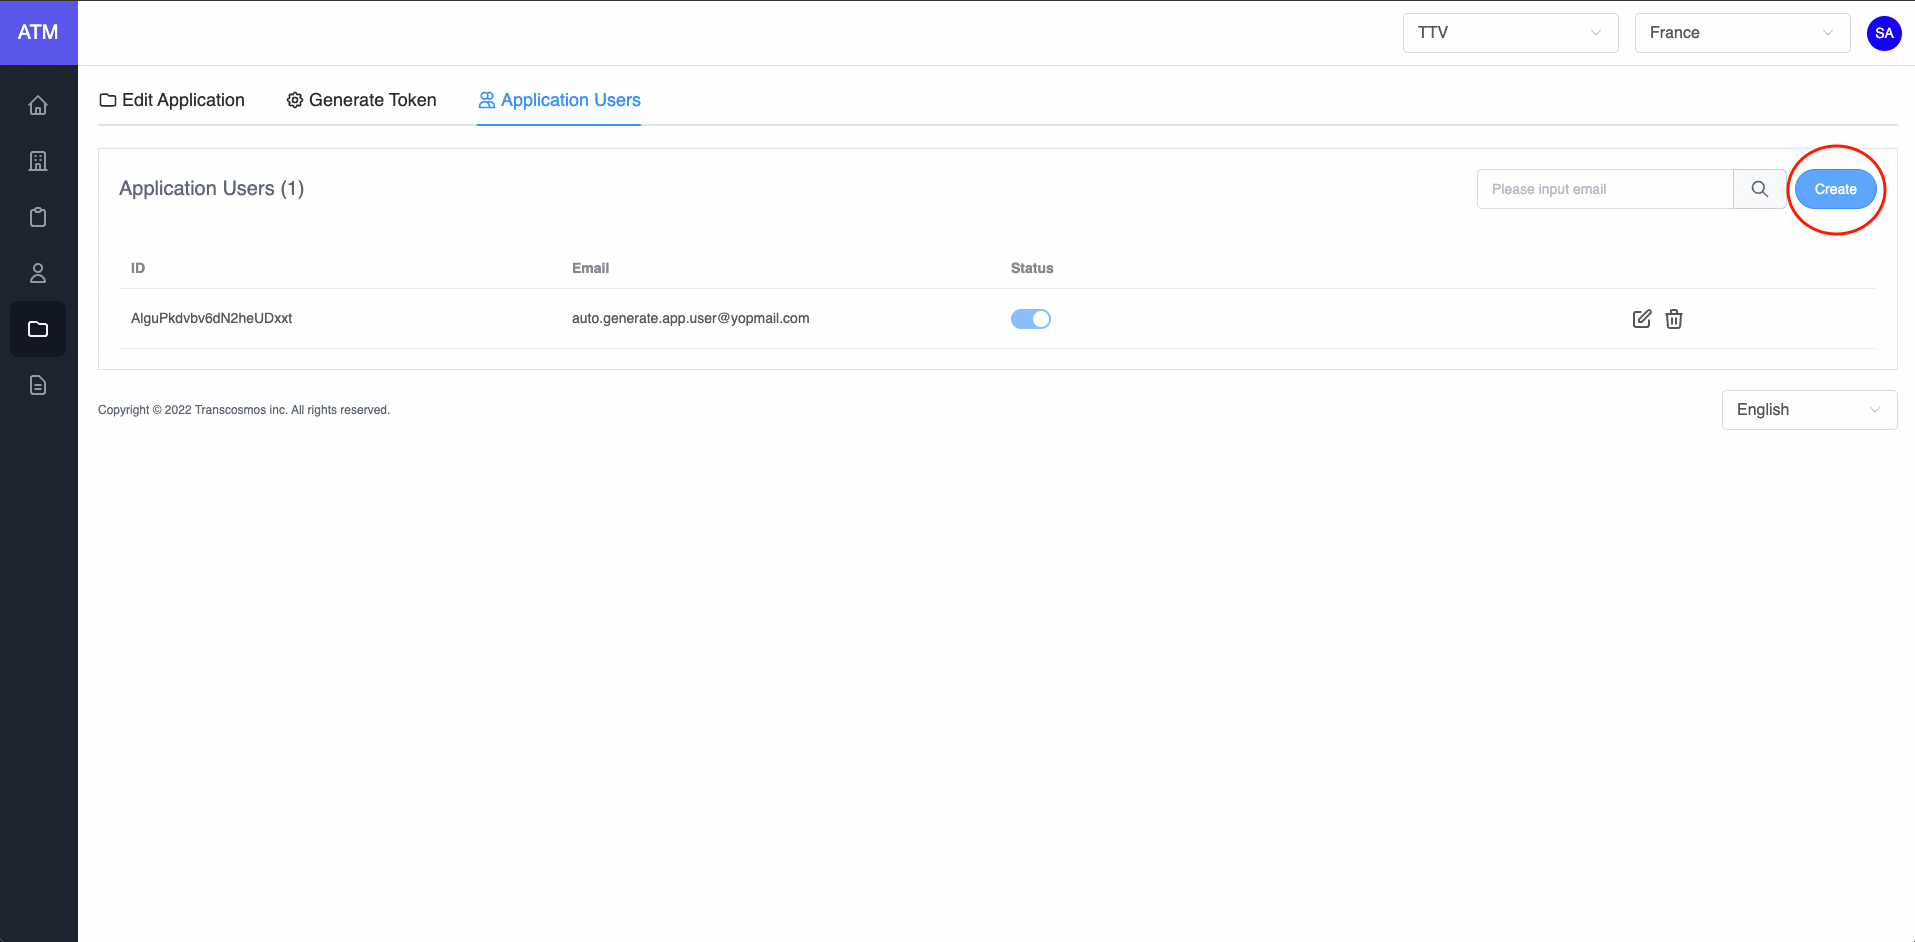
- Input data: First name, Email. Password and Confirm Password
- Click on the Save button
- Integrated
When user wants to login to the system, it will redirect to page http://stg.token.tci-pf.net/login?clientId=. With clientId is provided when creating application. After user login successfully, ATM will auto redirect URL with code. Example: http://localhost:8080/callback?code=k2j5QFYN66ob0H5H12e50EorNkwxKgLV0XaRjnY9guF9kt8bex.
Now that you've acquired an authorization_code and have been granted permission by the user, you can redeem the code for an access_token to the resource. Redeem the code by sending a POST request to the /auth/token endpoint. Example:
Step 1: Call API to login (Refer to this link)
* Api:
  Name: authenticationApp
  Path: /auth
  Method: POST
  Payload:
json
{
  "loginId": "end.user13@gmail.com",
  "password": "H123456789",
  "clientId": "OJJvmTmatjCOTuqBxur2"
}
- loginId: Email of user's application
- password: Password of user's application
- clientId: Get form application
Example:
javascript
var axios = require('axios')
var data = JSON.stringify({
  loginId: 'end.user13@gmail.com',
  password: 'H123456789',
  clientId: 'OJJvmTmatjCOTuqBxur2',
})

var config = {
  method: 'post',
  url: 'https://api.stg.token.tci-pf.net/auth',
  headers: {
    'Content-Type': 'application/json',
  },
  data: data,
}

axios(config)
  .then(function (response) {
    console.log(JSON.stringify(response.data))
  })
  .catch(function (error) {
    console.log(error)
  })
Response data:
json
{
  "redirectUrl": "http://url-callback",
  "code": "aY3hgPCdKzGj6IDYNJrEzgKazZQsAZ1MkfvaQfFoG8mmPIfocs"
}
Step 2: Call API to generate token (Refer to this link)
* Api:
  Name: genTokenApp
  Path: /auth/token
  Method: POST
  Payload:
json
{
  "clientId": "MXSAUwpZycuhd2owvV2j",
  "clientSecret": "QhRhyGuSTP7S9cU6riqR3vPHETq9vErX",
  "grant_types": "authorization_code",
  "code": "aY3hgPCdKzGj6IDYNJrEzgKazZQsAZ1MkfvaQfFoG8mmPIfocs"
}
- clientId: Get from application
- clientSecret: Get from application
- grant_types: "authorization_code"
- code: Get from step 1
Example:
javascript
var axios = require('axios')
var data = JSON.stringify({
  clientId: 'MXSAUwpZycuhd2owvV2j',
  clientSecret: 'QhRhyGuSTP7S9cU6riqR3vPHETq9vErX',
  grant_types: 'authorization_code',
  code: 'aY3hgPCdKzGj6IDYNJrEzgKazZQsAZ1MkfvaQfFoG8mmPIfocs',
})

var config = {
  method: 'post',
  url: 'https://api.stg.token.tci-pf.net/auth/token',
  headers: {
    'Content-Type': 'application/json',
  },
  data: data,
}

axios(config)
  .then(function (response) {
    console.log(JSON.stringify(response.data))
  })
  .catch(function (error) {
    console.log(error)
  })
Response data:
json
{
  "id_token": "",
  "access_token": "",
  "refresh_token": "",
  "exp_access_token": 600 // Time expire access token. 600 seconds
}- Refresh the access token
Access tokens are short lived. Refresh them after they expire to continue accessing resources. You can do so by submitting another POST request to the /auth/token endpoint. Provide the refresh_token instead of the code (Refer to this link). Example:
* Api:
  Name: genTokenApp
  Path: /auth/token
  Method: POST
  Payload:
json
{
  "clientId": "DwSljVC4Ycr5YAv2Qbkf",
  "refresh_token": "",
  "id_token": "",
  "grantType": "refresh_token"
}
-clientId: Get from application
-grant_types: "refresh_token"
After authentication success, ATM will return the access token, refresh token, id token
javascript
var axios = require('axios')
var data = JSON.stringify({
  clientId: 'DwSljVC4Ycr5YAv2Qbkf',
  refresh_token: '',
  id_token: '',
  grantType: 'refresh_token',
})

var config = {
  method: 'post',
  url: 'https://api.stg.token.tci-pf.net/auth/token',
  headers: {
    'Content-Type': 'application/json',
  },
  data: data,
}

axios(config)
  .then(function (response) {
    console.log(JSON.stringify(response.data))
  })
  .catch(function (error) {
    console.log(error)
  })
Response data:
json
{
  "id_token": "",
  "access_token": "", // New access token
  "refresh_token": "", // New refresh token
  "exp_access_token": 600 // Time expiration access token is 600 seconds
}- How to validate the access token RSA 256
Call API to get the login key (Refer to this link)
  * Api:
    Name: getJWKS
    Path: /auth/.well-known/jwks.json
    Method: GET

Example:
javascript
var jwksClient = require('jwks-rsa');
var client = jwksClient({
  jwksUri: 'https://api.stg.token.tci-pf.net/auth/.well-known/jwks.json'
});

```javascript
var jwksClient = require('jwks-rsa')
var client = jwksClient({
  jwksUri: 'https://api.dev.token.tci-pf.net/auth/.well-known/jwks.json',
})

function getKey(header, callback) {
  client.getSigningKey(header.kid, function (err, key) {
    var signingKey = key.publicKey || key.rsaPublicKey
    callback(null, signingKey)
  })
}

jwt.verify(token, getKey, options, function (err, decoded) {
  console.log(decoded)
})
Decoded token:
json
{
  "iat": 1662607837,
  "iss": "atm",
  "exp": 1662608437,
  "aud": "dIwGvPwelNS3Je6AzH41t",
  "scope": {
    "email": "hao.appuser@yopmail.com",
    "id": "a34fZ4NmtQdXuk1k9_2Vt",
    "firstName": "Hao app user",
    "lastName": ""
  }
}